
Multi-Factor Authentication (MFA) is a powerful solution that surpasses simple passwords. It adds an extra layer of security by requiring multiple verification factors to access your accounts. With MFA, you can significantly reduce the risks of unauthorised access and data breaches.
Benefits of Using Multi-Factor Authentication (MFA):
- Enhances security for personal and professional accounts on platforms like Google and Microsoft 365.
- Requires multiple forms of authentication, such as something you know and something you possess, making it tougher for cyber attacks to succeed.
- Provides reliable defense against unauthorised access and cyber threats.
- Helps meet strict security regulations.
In this article, we'll explore the benefits of enabling Multi-Factor Authenticator in Google and MS365. We'll also guide you through the steps for setting up MFA in Google. Let's get started!
Let's explore the key advantages of using Multi Factor Authentication:
Improved Security Protection Against Unauthorised Access
MFA (Multi-Factor Authentication) works by combining various methods to verify your identity. It could be something you know (like a password), something you have (such as a mobile phone or hardware token), or something you are (such as biometric data). By using two or more factors, it creates a strong defense. So even if someone manages to get your password, it becomes much harder for them to gain unauthorised access. This makes your overall security stronger.
The extra layers of Verification provided by MFA work well in deterring unauthorised access attempts. It sets a higher standard for attackers, making it harder for them to breach accounts or get hold of sensitive data with just a stolen password. This added complexity acts like a strong barrier, lowering the chances of unauthorised individuals trying to infiltrate systems from being successful.
Preventing Phishing and Cyber Attacks
MFA offers a wide range of authentication measures to safeguard against different cyber threats, like phishing attacks. In these sneaky attacks, hackers typically send deceptive emails to trick users into revealing their login details. But with MFA's additional verification steps, even if login credentials are compromised, it becomes really hard for unauthorised individuals to get their hands on user data.
Security Compliance
In many industries and organisations, particularly those dealing with sensitive data or operating in regulated environments, there's a need to comply with regulations like GDPR, HIPAA, or PCI DSS. By implementing MFA, organisations can meet these standards and ensure they follow all the required security protocols and regulatory frameworks.
Enhanced User Control and Visibility
MFA (Multi-Factor Authentication) gives you more control over your accounts and activities, empowering you to stay on top of your security game. It provides detailed logs of login attempts and access actions, giving you a clearer view of what's happening with your account. This increased visibility allows you to carefully monitor and verify access, proactively detecting and resolving any potential security threats. Stay vigilant and keep your accounts safe!
Steps to Set Up MFA on Microsoft 365
Enabling multi-factor authentication (MFA) on Microsoft 365 is actually quite simple. All you need to do is access the administrative settings, configure your user preferences, and choose your authentication methods. By following these steps, you can boost the security of your account and enjoy a much stronger level of protection.
Step 1: Access Microsoft 365 Security Settings: To access your Microsoft 365 account, just use your login details. Once you've logged in, you can go to either the Admin Center or the Security settings section, depending on your access level.
Step 2: Enable Multi Factor Authentication: To find the settings for Multi Factor Authentication, simply navigate to either the Admin or Security center. You'll be able to find this feature under security settings or even user configurations. Happy exploring!
Step 3: Configure Users for MFA: Choose the users or groups you want to activate MFA. This step lets you customise based on user roles or organisational needs.
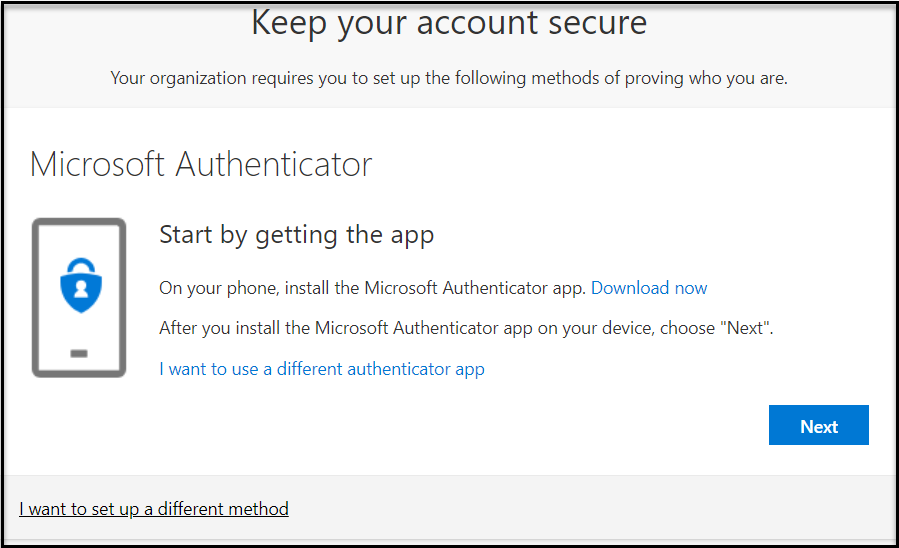
Step 4: Select Authentication Methods: Microsoft 365 gives users a variety of authentication options to secure their identities. These include text message codes, authenticator apps, phone calls, and even hardware tokens. So, you can choose the methods that work best for you!
Step 5: Enforce MFA Settings: Once you've chosen and configured the desired authentication methods, it's time to enforce the MFA settings for the selected users or groups. This step will activate MFA, making it necessary for access to provide the chosen authentication factors. And the best part? You can even enable the Microsoft authenticator without a smartphone!
Steps to Set Up MFA on Google Accounts

Google's 2-Step Verification, which works similar to Multi Factor Authentication, adds an extra layer of security. To enable this feature, you just need to go to your account settings, choose an authenticator app, and effortlessly integrate it with your Google Account to enhance its security. Easy peasy!
Step 1: Access Google Account Security Settings: Hey, to get started, just log in to your Google account. Once you're in, go ahead and check out the Security settings. You can find this section either in your profile or account settings.
Step 2: Select 2-Step Verification: When you're going through the settings, keep an eye out for the option to set up 2-Step Verification. It's a great way to add an extra layer of security on top of your strong password.
Step 3: Choose an Authenticator App: You should totally use an authenticator app for MFA! It's super handy because it generates verification codes and adds an extra layer of security to your logins.
Step 4: Scan QR Code: Go ahead and use the authenticator app to scan the QR code on the screen. This step will link the app to your Google account.
Step 5: Enter Verification Code: To finish setting up your MFA, just enter the verification code generated by the authenticator app. This code will confirm the link between your account and the authenticator app, and that's it - setup process complete!
Need some help with implementing MFA? With Klyk, bolstering your cybersecurity and business efficiency is no longer a complex task. Get in touch & we'll fortify your cyber defenses and enable your business to concentrate on other priorities.
